How to install PostgreSQL in Ubuntu

Introduction
When developing applications or running any sort of service in your home, sooner or later, you will need a relational database. PostgreSQL is one of the best choices available.
What will You learn?
In this tutorial, I will guide you through setting up PostgreSQL on an Ubuntu machine in my homelab.
PostgreSQL Installation on Ubuntu
I assume that you have already installed a fresh copy of Ubuntu, or you have one running. If not, check out Creating LXC Containers tutorial for a quick start (https://maciejfil.com/how-to-create-linux-containers-in-proxmox).
Let’s start by updating the repositories and system (especially if it is a fresh Ubuntu copy).
apt update && apt upgrade
Now we can install PostgreSQL. Run the following command:
apt install postgresql

Verify the installation by checking if the service is running.
systemctl status postgresql

Create new PostgreSQL database and table
As shown in the screenshot, it seems to be working. Let’s try to log into our freshly installed database. During installation, user postgres was created for us. So, let’s use it:
sudo -u postgres psql
At this point, please set up a password. Just type \password postgres and you will be asked to provide one.
Next, let’s list all database schemas in PostgreSQL with the \list command. By default, database postgres is created for us.

Let’s add a new database, call it test_db and create a table Users
CREATE DATABASE test_db;
With below command we will switch context to use only test_db.
\c test_db
And now let’s create a table with some example data.
CREATE TABLE Users ( id SERIAL PRIMARY KEY, username VARCHAR(50) NOT NULL, email VARCHAR(100) UNIQUE NOT NULL );

INSERT INTO Users (username, email) VALUES
('john_doe', '[email protected]'),
('jane_smith', '[email protected]'),
('mike_jones', '[email protected]');

select * from users;
Connecting to PostgreSQL from client
Before we begin, let’s check what port PostgreSQL is exposing. In terminal type netstat -plnt. It is 5453. I was trying to connect to database from my laptop, but it failed.
By default, every new installation of PostgreSQL allows connections only locally — in my case, when I’m logged into the Ubuntu machine. There may be a time when you need to allow an external service to connect to the database. In order to do so, we need to perform couple of steps.
I’m always backing up every config file before I make any changes, so execute the following:
cd /etc/postgresql/16/main
cp postgresql.conf postgresql.confBACUP
Then open file in your favourite text editor. I’m using nano.
nano postgresql.conf
Find the listen_addresses line, uncomment it, and put * in the brackets.

Next up open pg_hba.conf and add the following line:
host all all 0.0.0.0/0 md5
This configuration line basically means that we will be able to connect to any database with any user from any IP address. You can adjust those parameters as needed.

Save all and exit. To make those changes take affect, we need to restart postgresql service.
systemctl restart postgresql
systemctl status postgresql
If everything was done correctly, then service should be active again.

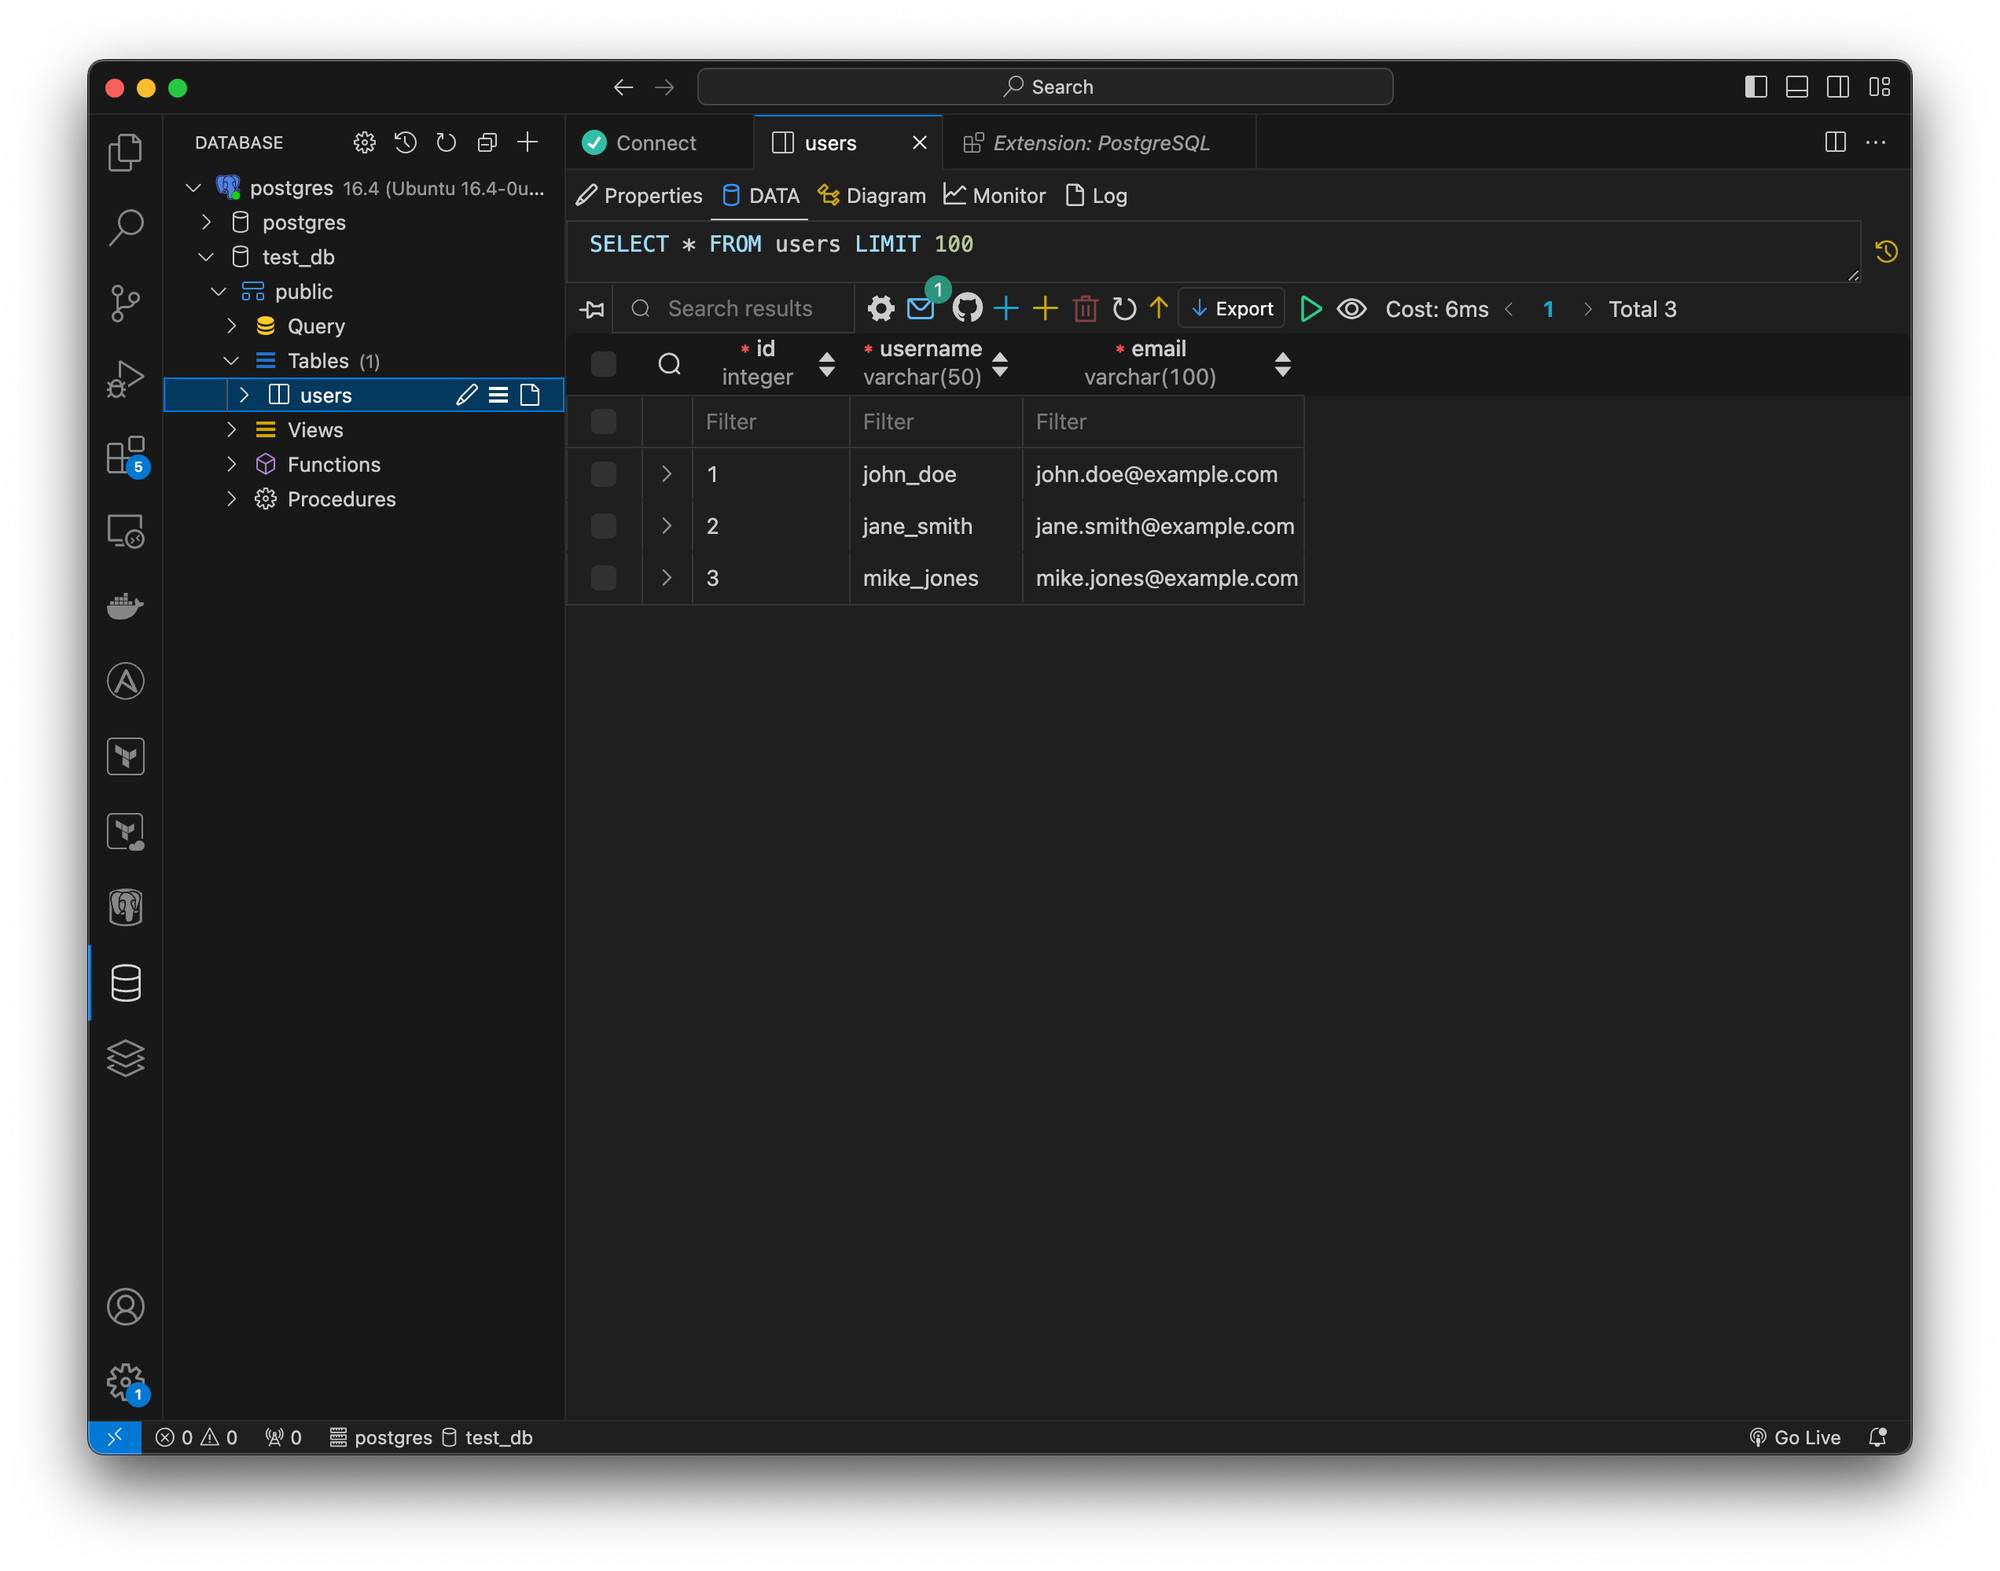
As you can see, I was able to connect from Visual Studio Code and query the Users table.

Conclusion
In this tutorial, I’ve guided you through installing and performing the initial setup of a PostgreSQL database. Try it yourself and let me know if you had any issues installing it.
If you found this article helpful, consider buying me a coffee. This helps me continue writing these articles for you!
