How to create Linux Containers in Proxmox

In today's article, I will guide you through setting up a Linux container.
What Is a Linux Container (LXC)?
In simple terms, each Linux container is an extremely lightweight virtualization solution. Each container acts as a full-fledged operating system - just like in a VM - but with one difference: it is shares the host’s kernel.
You can run LXCs on every linux distribution. In its early stages, Docker (which I’m sure you are familiar with) utilized Linux containers.
#1 Download the Template
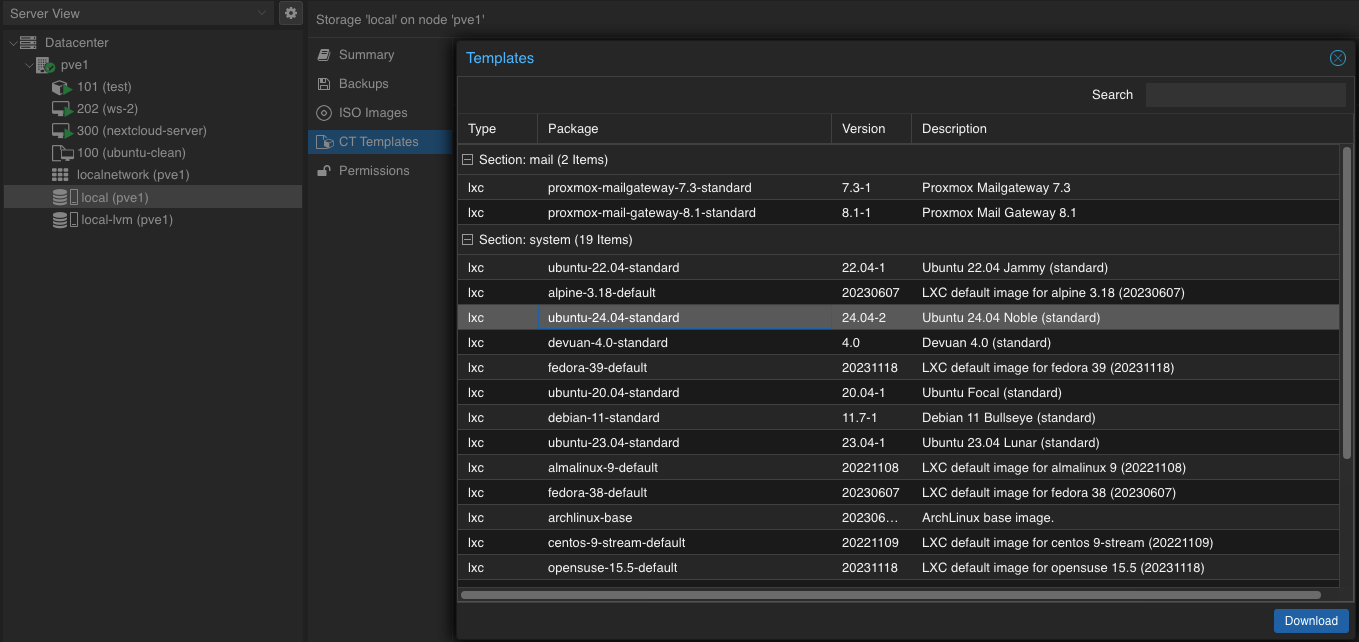
As the first step, let’s jump into Proxmox and head over to local storage. Then click CT Templates. In the upper part click Templates and a list of available templates will appear. Select desired template. For the purpose of this tutorial, I will be using Ubuntu 24.04. Hit Download and wait until it finishes.
#2 Create LXC
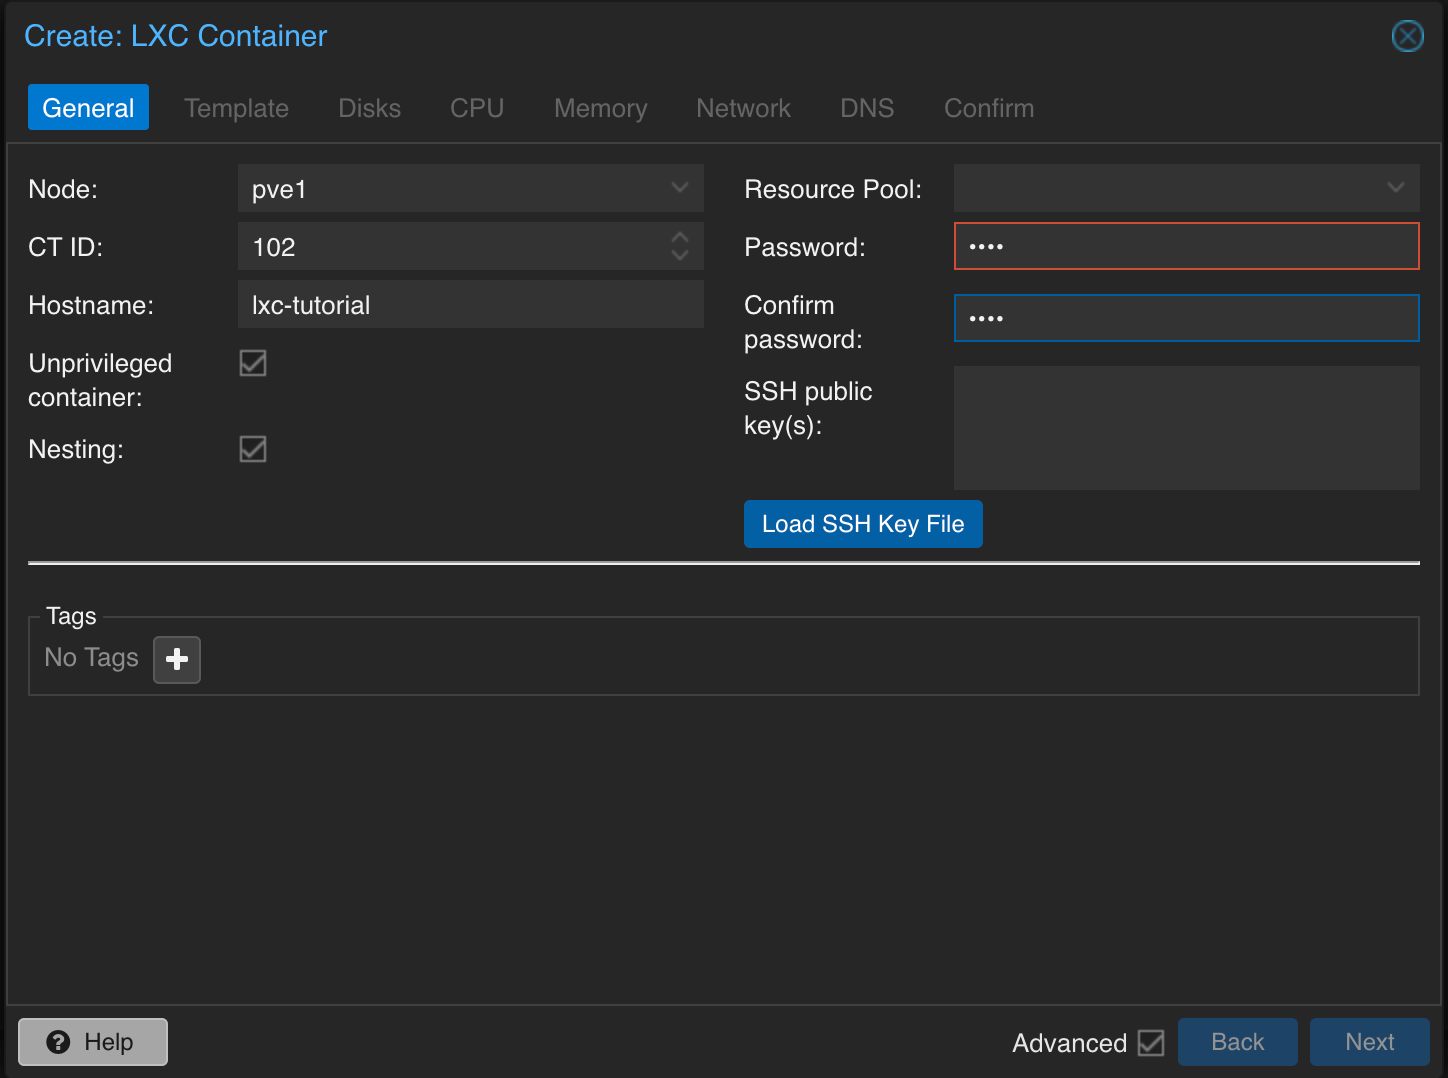
Let me now guide you through the process of creating Linux container. In Proxmox, the process is quite simple and can be done entirely through the GUI. In top right corner find Create CT, and click it. Window should pop up.
There, fill in required data:
- CT ID - I recommend leaving as is, but you can change it,
- hostname - of your choice,
- password, confirm password,
- SSH public key - if you have, paste here contents of the .pub file
Leave Unprivileged container (has limited access to host resources, thus a bit more secure) and Nesting checkbox as is and hit Next.
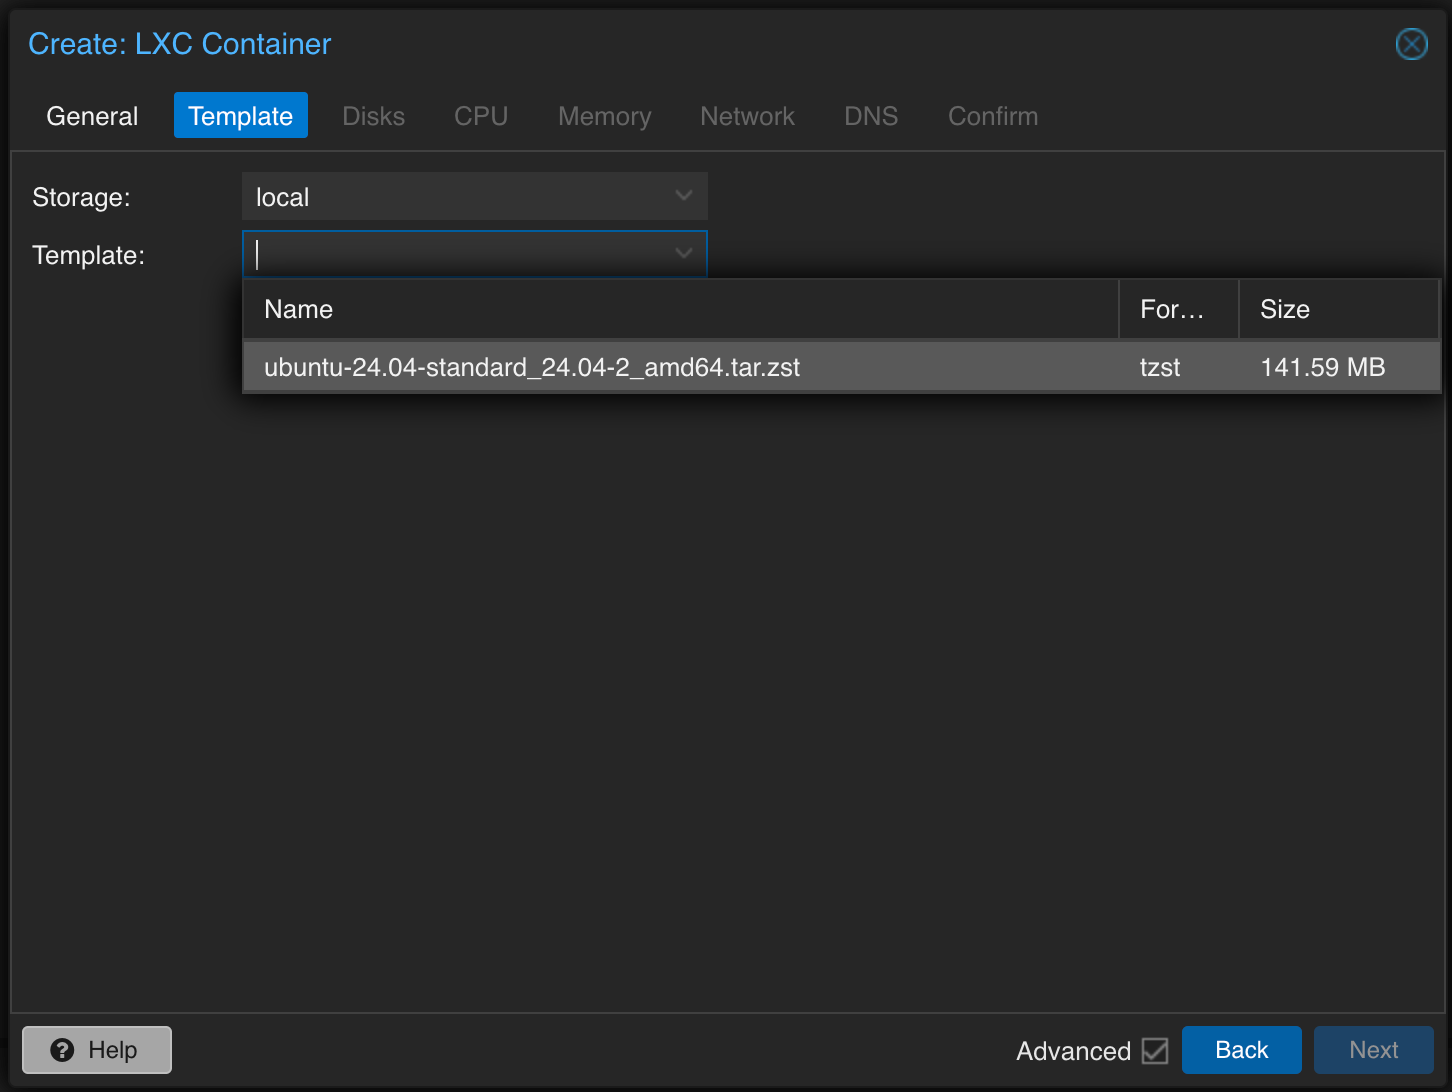
In the next window choose the template you want to use. As mentioned earlier, I will be using Ubuntu.
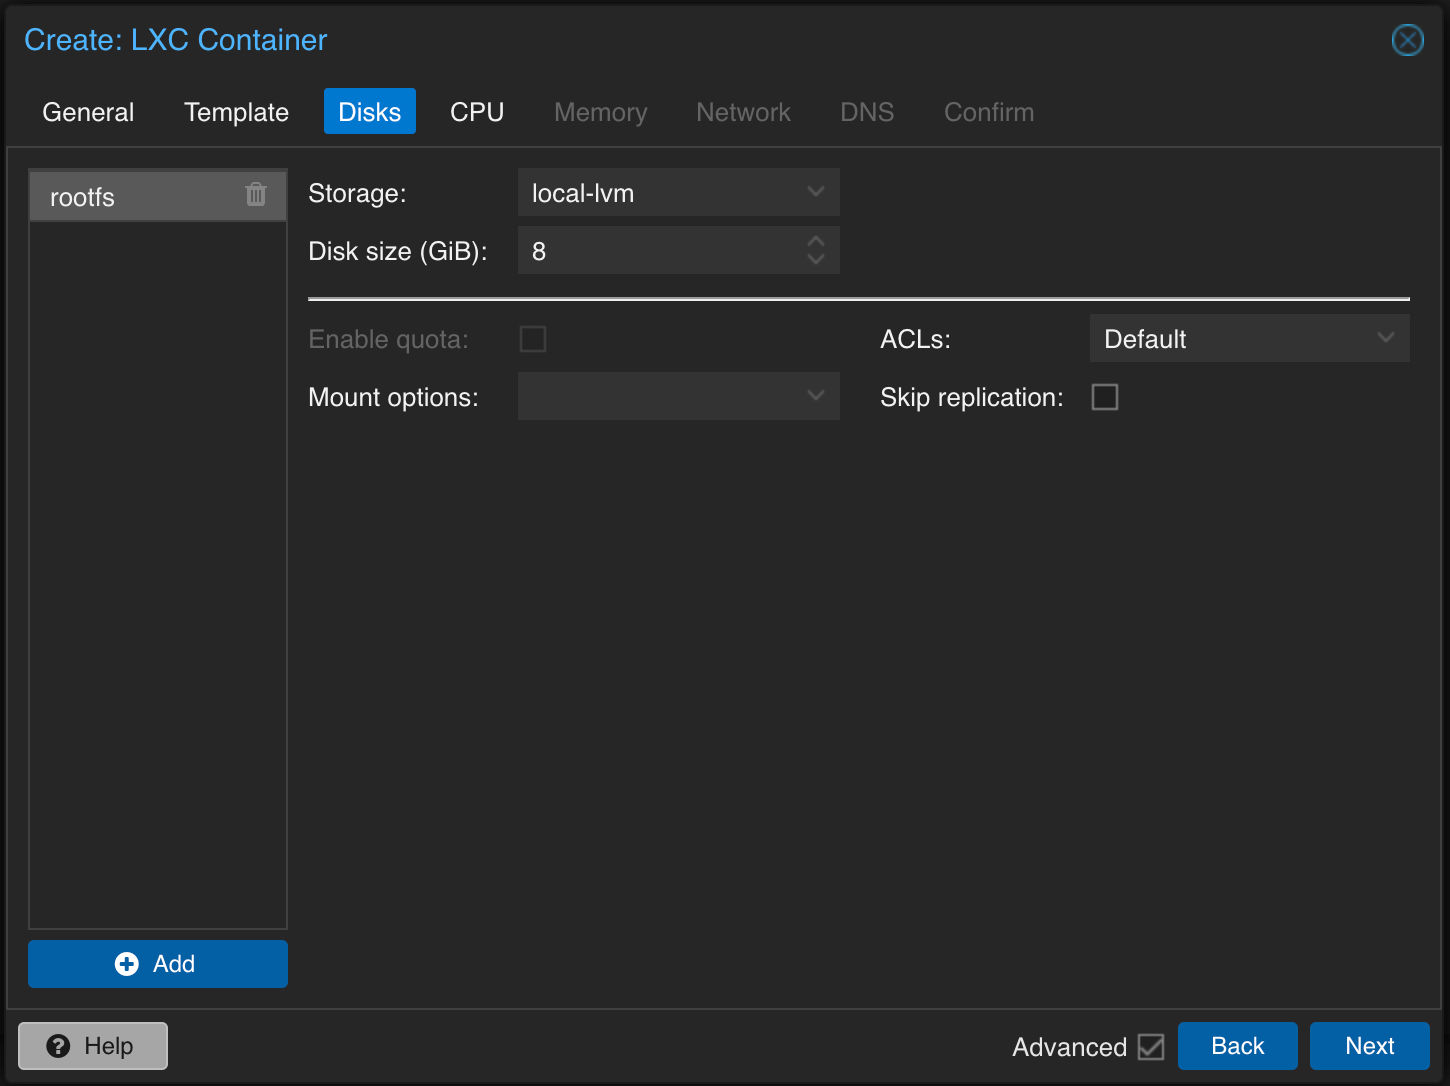
Next up, we will set up Disk space. I suggest leaving it as is - 8GB, but feel free to extend as you like. Other parameters can be left as default.
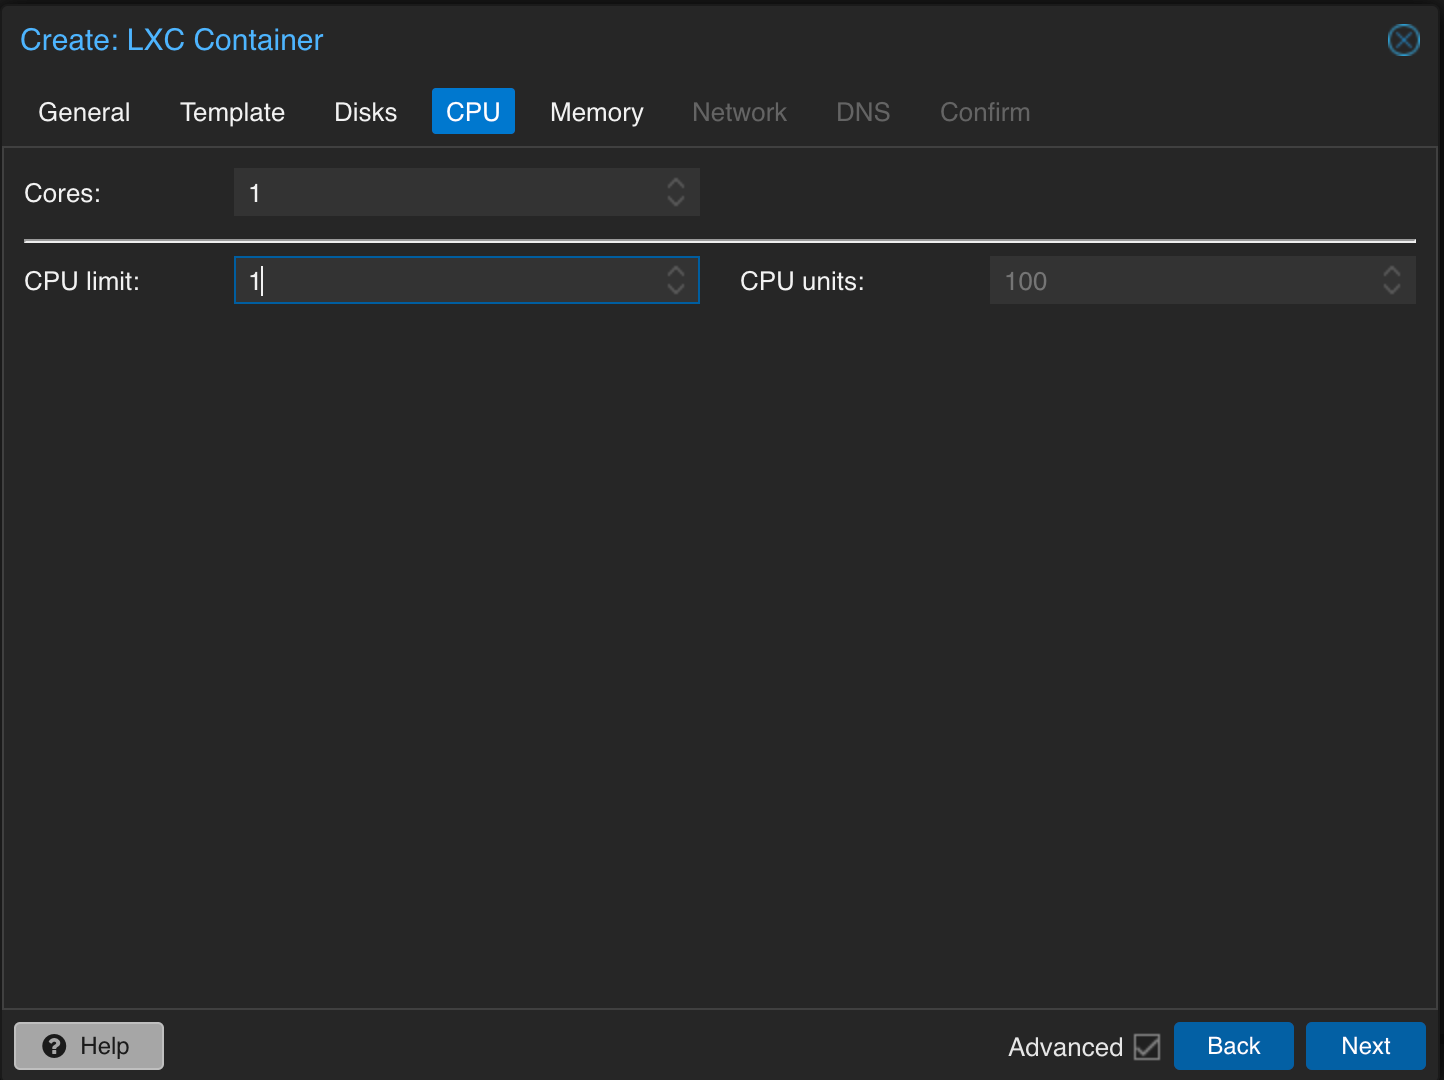
In the next tab, we will be configuring CPU. Number of cores available depends on the machine that you are running. In my case I have 4 cores available, but I don’t want to use them all. Since this LXC is just for the purposes of this article, I’m choosing 1 core, and setting the CPU Limit to 1 as well. CPU limit is important to set, as trust me - you don’t want to let the container to adjust number of cores used by itself.
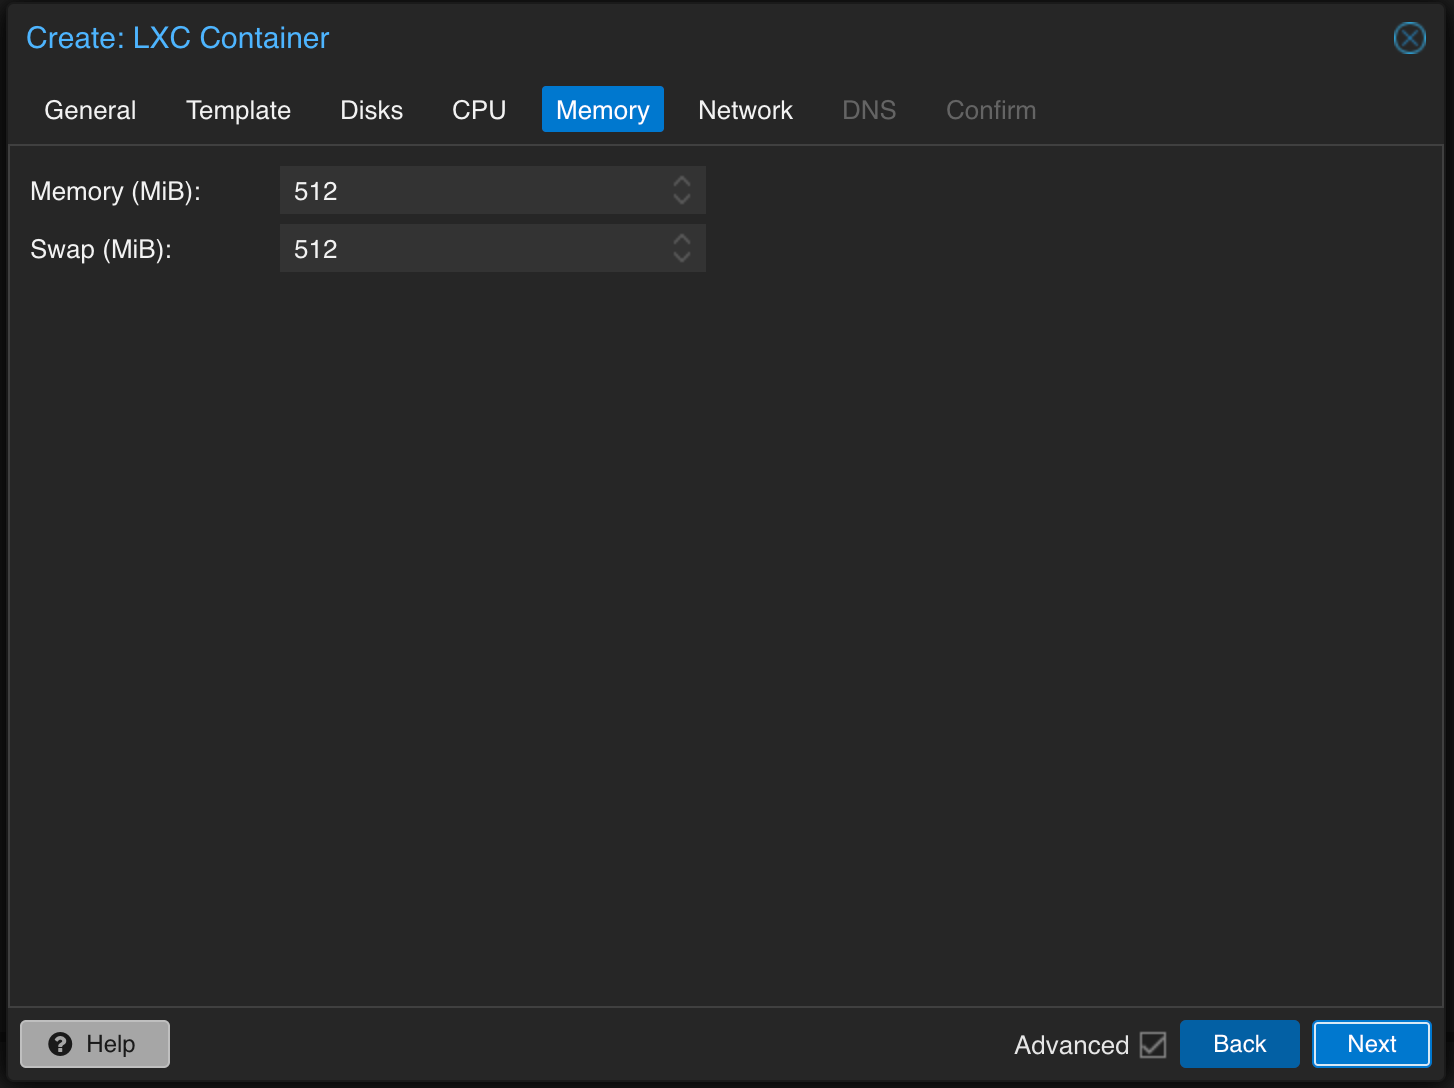
Memory tab is quite straight forward. I’m not planning to use that LXC heavily, I will set both Memory and Swap to 512MiB.
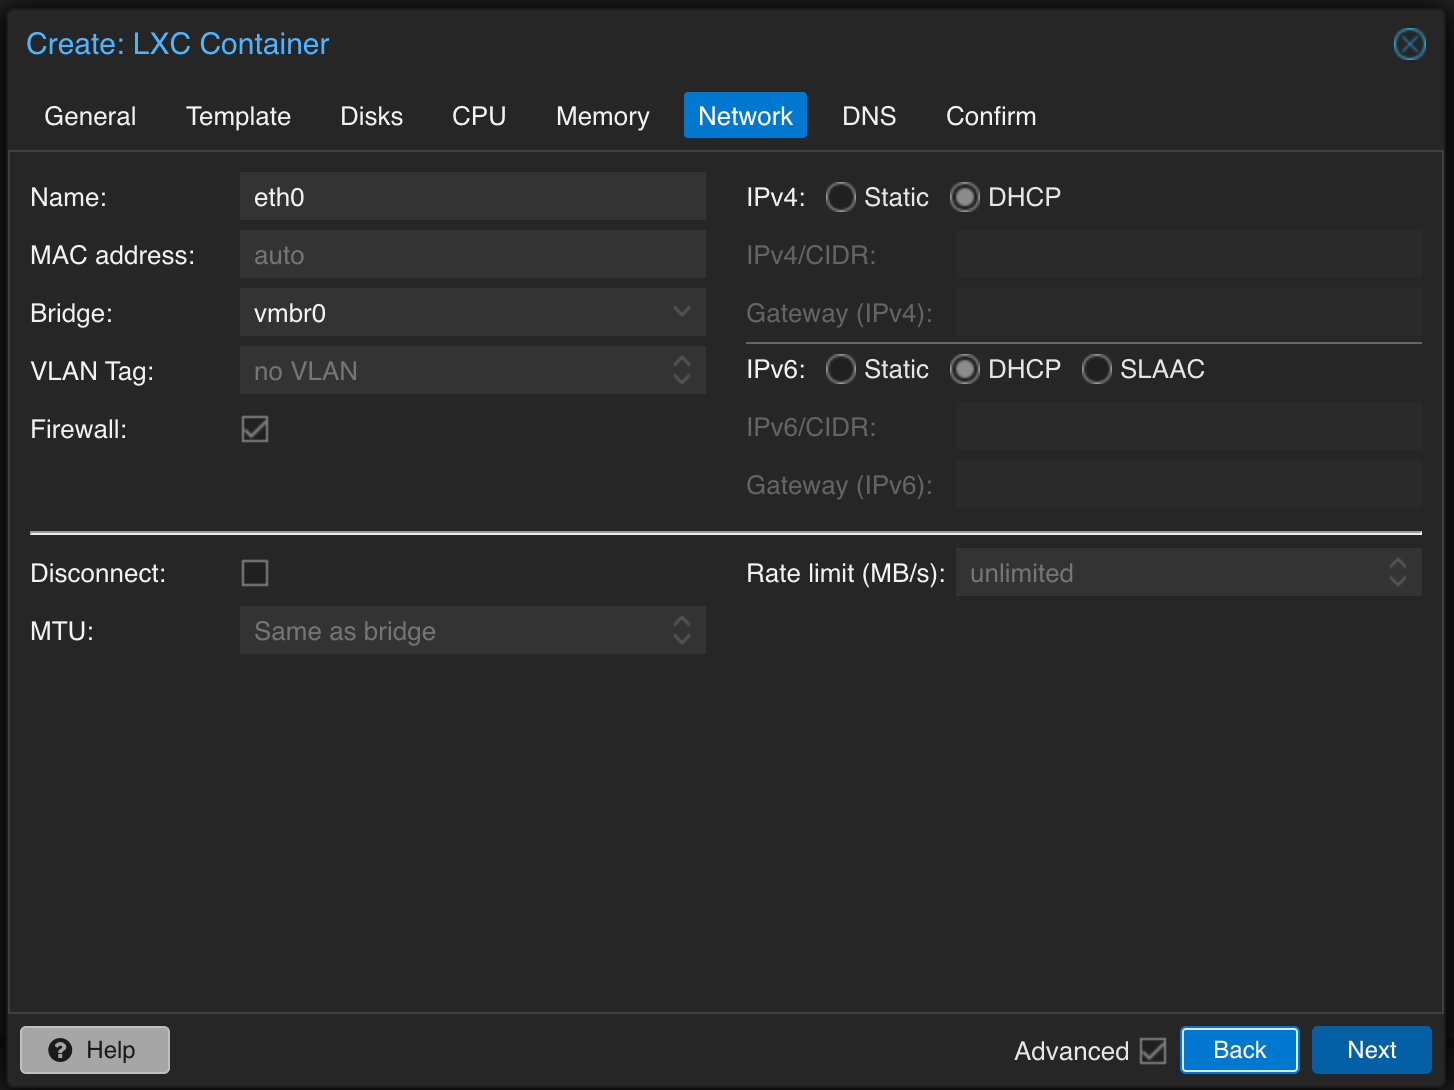
Next, the Networking tab. Here I’m using DHCP to acquire IPv4 address, but if you can setup it manually if you want so. Other than that, I leave all other parameters as default.
In `DNS` section I also leave it default as I’m not running any local DNS server.
At the last tab there will be a summary of all our setup. Hit Finish, and wait a bit.
You should notice on the left side that the LXC has been created, but it is not running yet.
Click on the new container and press `Start` to run it.

#3 Verify the solution
While still in your container, navigate to Console. Login as root. You should be welcomed with a standard message, just like in the screen below.
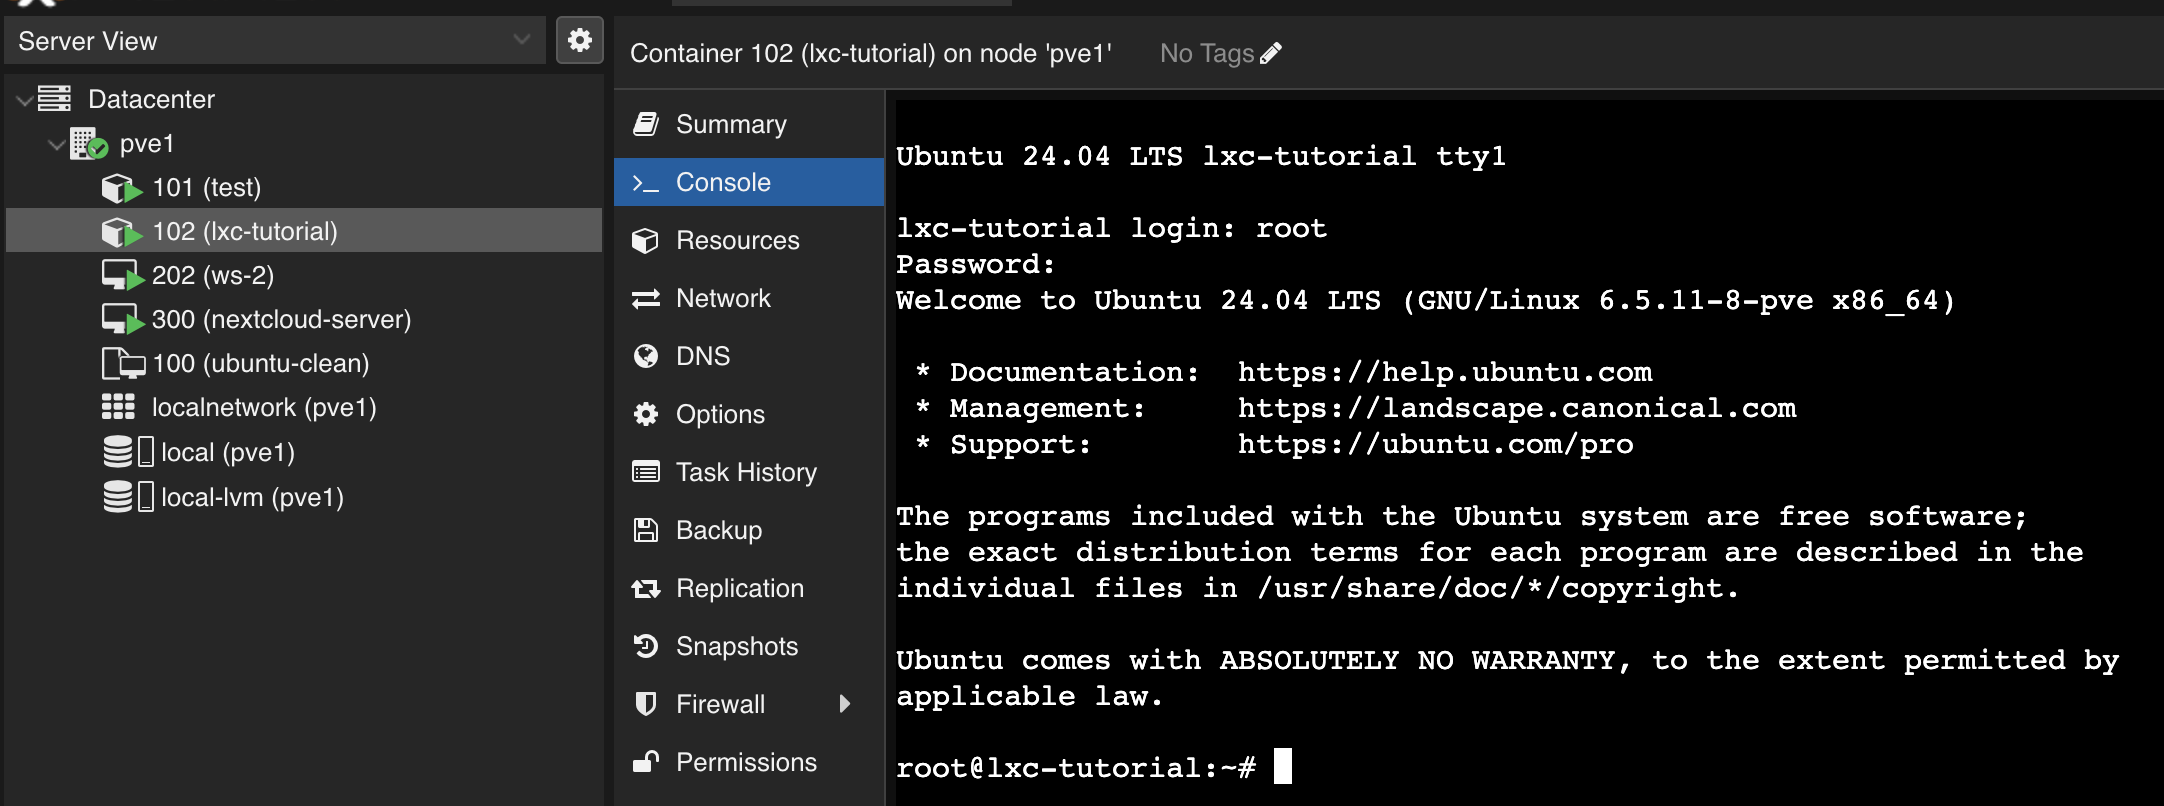
To learn, what IP your machine has, you can type ip a command.
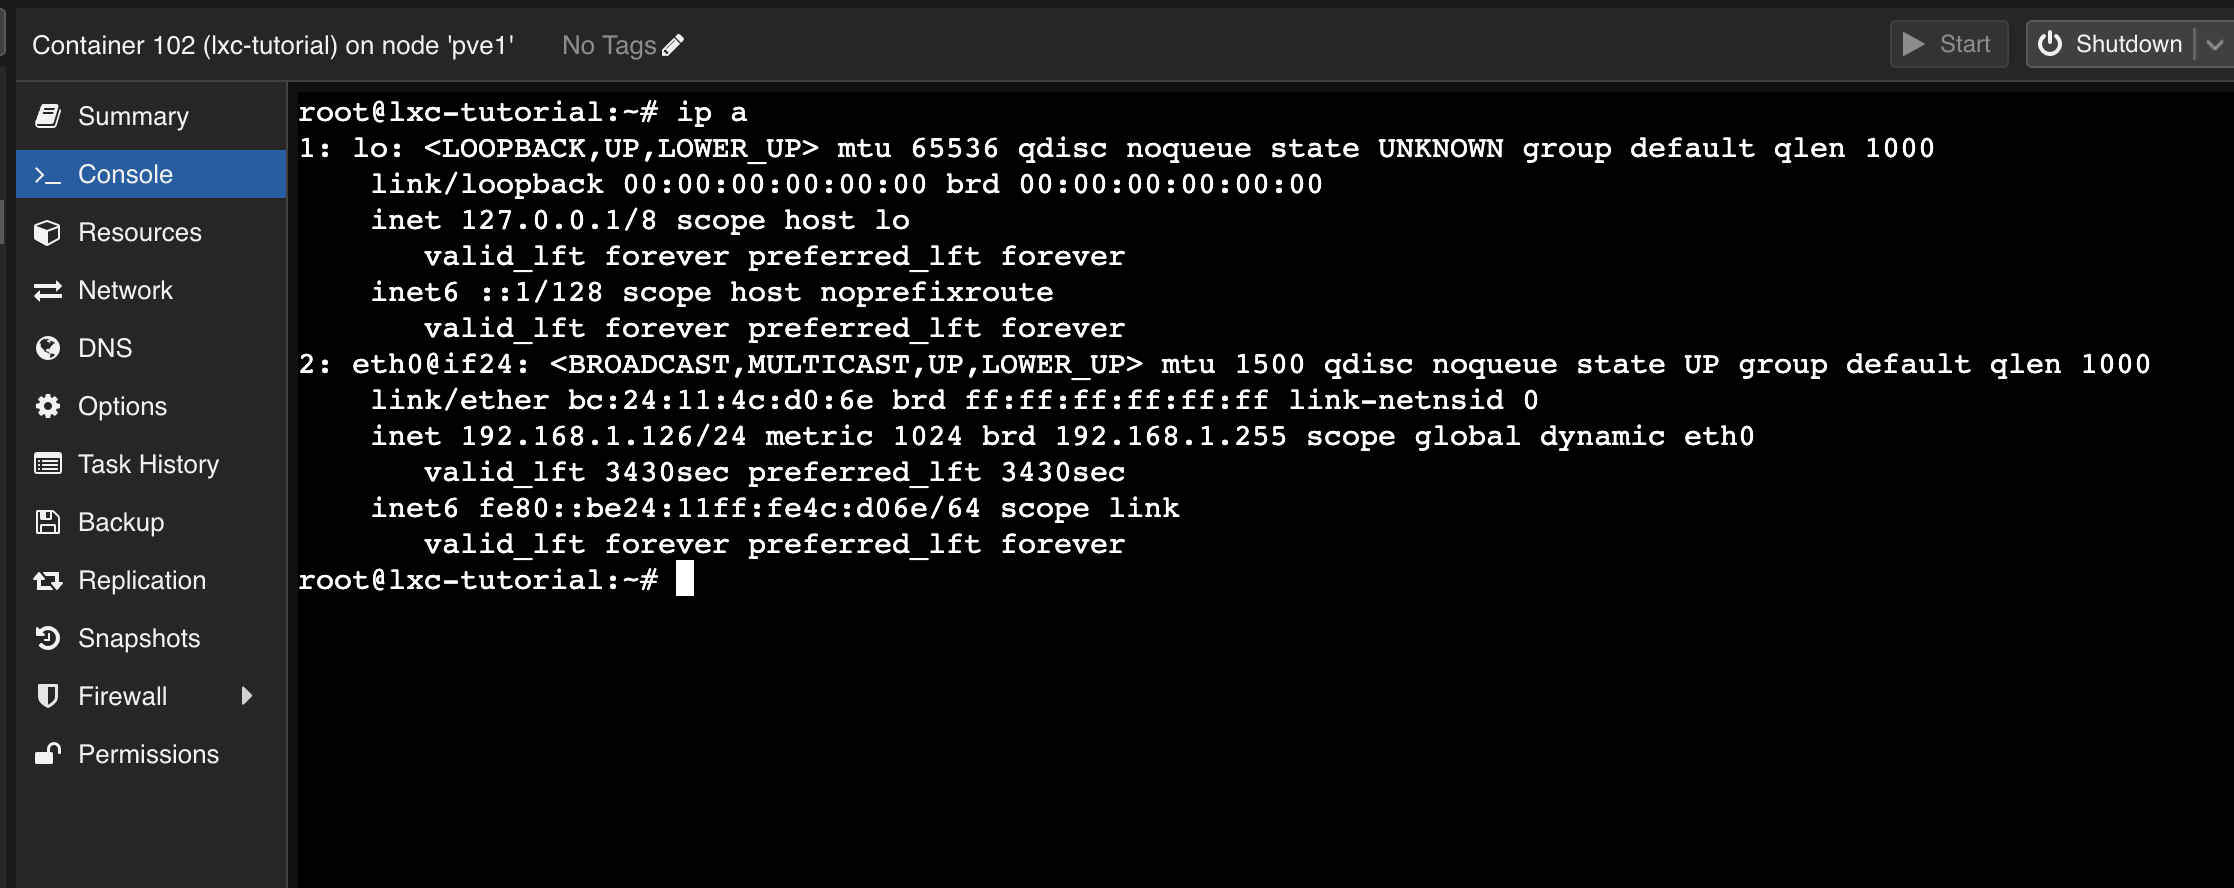
Now you can easily SSH as root to your new Linux Container.
Conclusion
In this article I showed you how to create Linux Containers in Proxmox GUI. You can see that the process takes only a few minutes. Try it out in your own Proxmox instance!
References:
https://www.redhat.com/en/topics/containers/whats-a-linux-container
https://www.baeldung.com/linux/privileged-container-capabilities
https://www.cyberciti.biz/tips/linux-swap-space.html