How to setup Ghost on Docker with Nginx Proxy Manager and Cloudflare

Introduction
Recently, I came up with the idea that I would like to try out something other than WordPress as a blogging platform. After some research, I decided to check out Ghost.
I was struggling to set it up on my web-server. After many trial and error attempts I finally sorted it out. There were plenty of questions posted over the web regarding that topic, but there was no straight-to-the-point solution.
Below you will find my approach to setting up Ghost on your web server using Docker and Nginx Proxy Manager.
Prerequisites
This tutorial is for you when:
- Your machine is already running Docker and Nginx Proxy Manager (NPM).
- Your domain name is added to Cloudflare.
Overview of the solution
To help you visualise what we are trying to achieve, take a look on the diagram below.
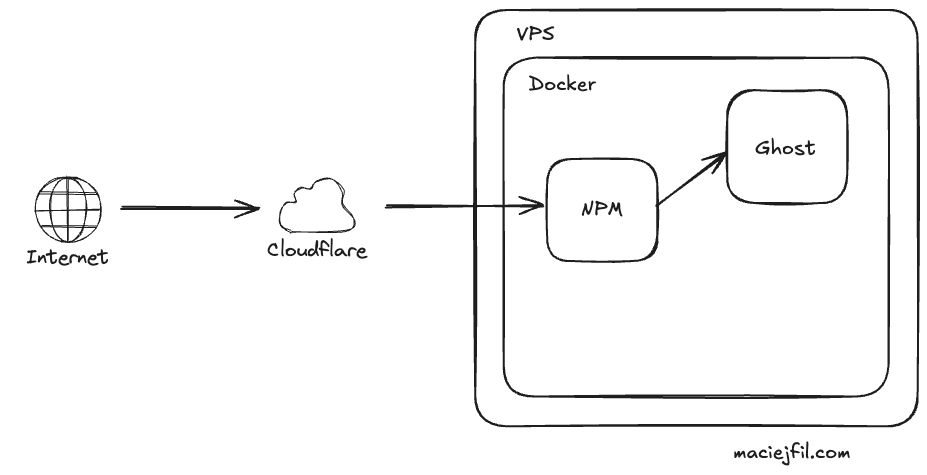
In my case, since my VPS provider is "IPv6-mostly" I'm using Cloudflare's free IPv4 -> IPv6 tunneling. Apart from that, Cloudflare offers ton of security features which are also free.
#1. Installing Ghost with Docker Compose
Here is my docker-compose setup file.
services:
  ghost:
    image: ghost:5.82.2
    container_name: ghost
    restart: always
    environment:
      url: https://your-domain.com
      database__client: mysql
      database__connection__host: DB_HOST
      database__connection__user: DB_USER
      database__connection__password: DB_PASSWORD
      database__connection__database: DB_NAME
    volumes:
      - ghost_data:/var/lib/ghost/content
    networks:
      - network1
networks:
  network1:
    name: nginx-proxy-network
    external: true
volumes:
  ghost_data:
    external: true
Let me explain the configuration a bit. At this very moment image is set to version 5.82.2. You can use latest but it may be difficult to tell which version you are actually running. That is why I tend to provide specific version of docker image. Next up, I use mysql as perffered database stack. If you like, you may use Postgres as well. Make sure to attach a Docker volume so you won't lose your entire data. I also make sure that Ghost container is in the same Docker network as Nging Proxy Manager.
#2. Setting up the domain in Cloudflare
Now, let's configure Cloudflare. I'm hosting my site on mikr.us VPS, therefore I will be using IPv6 address. Similar configuration can be done for IPv4.
Navigate to your domain, and then DNS configuration. Add a new AAAA record (A record for IPv4) and paste your server address. Make sure that proxy status is in Proxied state. Don't forget to save the changes.

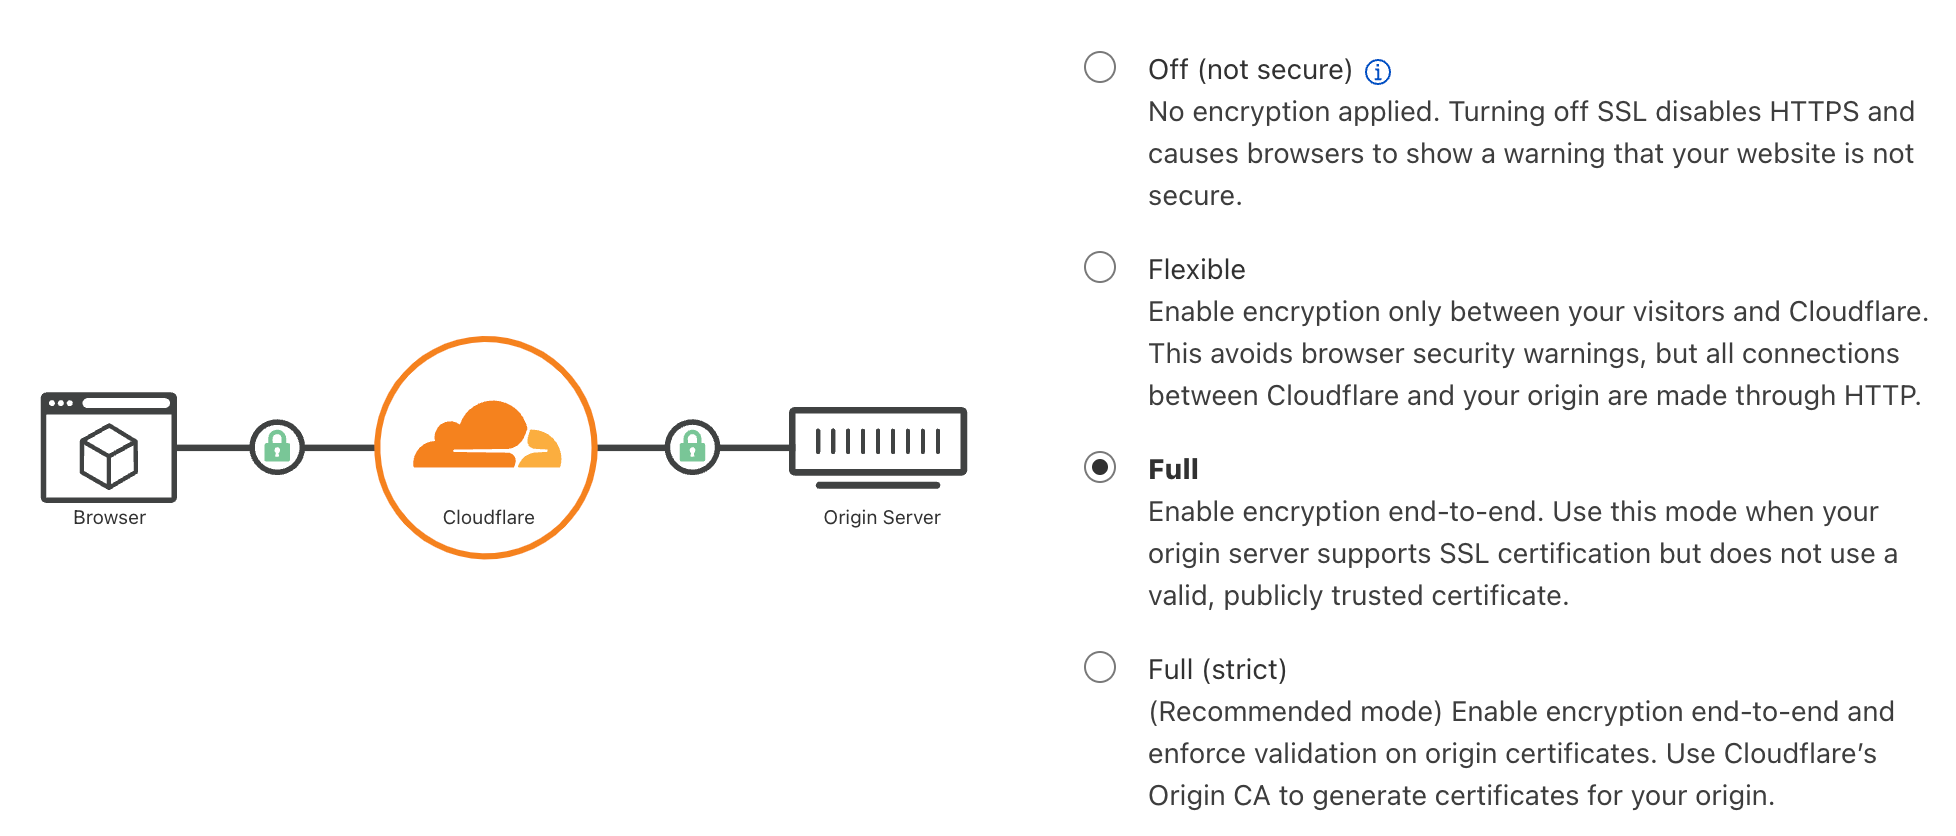
Also, at that point let's make sure that we are using full SSL encryption. That can be found under the SSL/TLS menu.
#3. Setting up the reverse proxy and SSL in Nginx Proxy Manager
Let's configure reverse proxy.
I'm running Ghost and Nginx Proxy Manager in the same docker network - nginx-proxy-network . Therefore I can use container names to setup proxy.
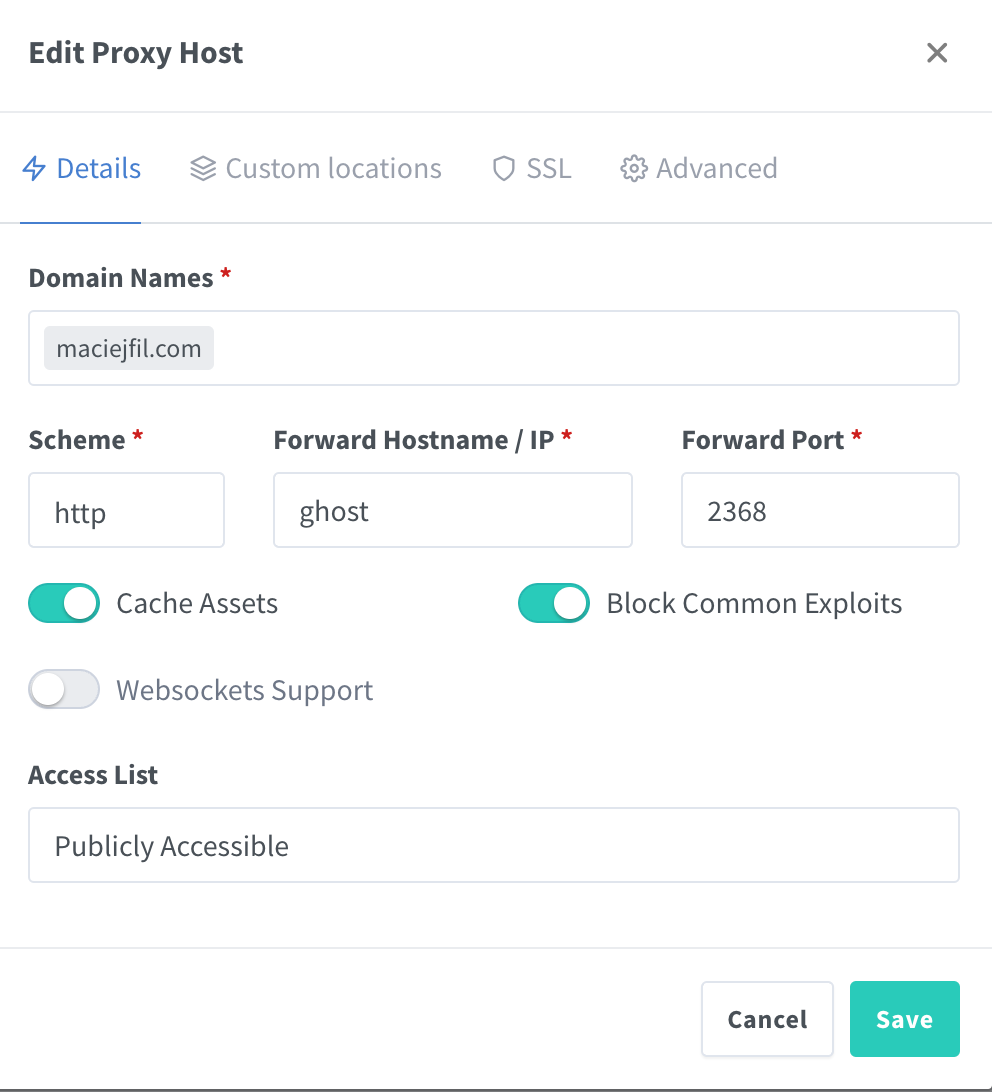
When adding new host, fill the parameters as follows:
- Domain names -> domain configured in CF
- Scheme ->
http - Forward Hostname / IP ->
ghost - Forward port ->
2368(default Ghost port) - Cache assets and Block common expoloits usage is up to you. I've turned them on.
We can skip Custom Location tab and go to SSL. Here we must add new Let's encrypt certificate. From drop down choose Request a new SSL certificate, then switch Force SSL. I'd suggest providing your real email in the next field - you may receive a mail regarding your certificate.
Lastly, in the Advanced tab insert:
proxy_set_header Host $http_host;
proxy_set_header X-Real-IP $remote_addr;
proxy_set_header X-Forwarded-For $proxy_add_x_forwarded_for;
proxy_set_header X-Forwarded-Proto https;
Click Save, and voila! Your Ghost instance is ready to go!
#4. Testing the solution
Navigate to your-domain.com and you should see your Homepage.
To access admin panel, go to /ghost .
Conclusion
In this tutorial, I've shown how to configure and run Ghost platform using Docker, Nginx proxy manager and Cloudflare.
P.S. it works - otherwise you would not be able to see this page 😄
I'm a coffee addict, so If you enjoyed this article and it helped you somehow, consider buying me a coffee. Thank you!
